Showing posts with label demi-glace. Show all posts

Friday, April 30, 2010

food fotos: pictures to accompany recipes and food cost analysis estimates


whenever i do a consulting job that requires recipes to be developed one thing i offer the client is accompanying photos. nothing beats a "seeing is believing" approach to teaching someone how to cook, and pictures also help to jar their memory once i have departed the training.

the following three dishes were developed for an american restaurant and martini bar that wanted to have not only a tapas type menu, but also some main dishes of note. the seafood cocktail in the over-sized martini glass was developed to coincide with the massive martini menu they offered at their bar.

these pictures were taken with a first generation logitech webcam, so please excuse the resolution and lighting. you will also notice i have marked up the images that were then put into an album which was kept in the kitchen so that the staff would have a quick reference guide when jamming out orders.


seafood martini: this has been on my menus in some sort of configuration 
since i worked for chef ted at nicoles in mendon, vermont. 
under all that deliciously fresh seafood is a cocktail sauce 
that has won praise for the over 27 years i have been making it. 
i will post that recipe one of these days.


proscuitto wrapped filet mignon: this was a dish we held over 
from the existing menu at the restaurant. we just dressed it up a bit. 
notice that i took the photo before the balsamic reduction was applied, 
so i photo-shopped some in. after all, its a working guide for chefs, not a magazine photo.
the veg in all these shots is one of my favorites, ratatouille. 
when you are serving a lot of guests, need a good sturdy veg and want to add some good colors, 
a good al dente rat will always have your back.


swordfish with 5 lotuses: nothing like a catchy exotic name to prod the guests 
into ordering something great that they may overlook otherwise.
the stuffing is made from sauteed until clear, minced garlic, shallots, leeks, onions and scallions 
that are bound with fresh chopped parsley and mozzarella, fontina and parmesan cheeses.
do not pocket and stuff the fish until you are a few minutes away from grilling it, 
otherwise it will taste like sh*t or possibly go sour. 
also cut as large a pocket as you can, and stuff the filling in as deeply as you can, 
because it has a tendency to ooze out while the fish is grilling.
also, before placing the fish on the flat hot steel put a few slivers of 
fresh ginger and a sprig of rosemary on it. 
this will sear the ginger and herbs into the flesh and infuse it with these flavors.
this is another great technique i learned from my mentor chef ted.
also, note that the plate is slightly glazed with a spoon of veal demi-glace. another chef ted-ism. some may think it inappropriate to put meat glaze
with the fish and my reply to them is:
you've never had a surf and turf dinner?
the fish is resting on a bit of sauteed spinach.
nuff said!

Friday, April 16, 2010

schnitzel: if you like crunchy food like i do, this is an easy dish to prepare


schnit·zel

n.

A thin cutlet of veal, usually seasoned, that is dipped in batter and fried.

[German, from Middle High German snitzel, diminutive of sniz, slice, from snitzen, to carve]


(Cookery) a thin slice of meat, esp veal See also Wiener schnitzel

[German: cutlet, from schnitzen to carve, schnitzeln to whittle

i know that everyone says to avoid fired foods and breading and batters, but if eaten in moderation, and if prepared in good oil, and eaten immediately, treat yourself to some schnitzel.

you can prepare this dish in the classic way with with veal - but pork, chicken, turkey or even lamb and beef can also be used. 
 
when i was working for chef rudy hilfiker in his connecticut restaurant that specialized in swiss cuisine, this was by far the most popular item on the menu.  he had a sous chef who worked days as an instructor at the cia, that would be the culinary institute of america, not the cia in langley, va. :-o between the two of us we were hard pressed at ties to keep yup with schnitzel production during meal time. because foods that are breaded and in this manner suffer incredibly indignities if prepared in advance of frying, we were only able to pound out and tenderize the veal before hand, and never were we to bread it until it was just going into the pan.

this restaurant sat 70 people at capacity, and we did 2 fully sold out seatings a night, 7 nights a week. with out fail, 140 pax a day, guaranteed. despite knowing that this would happen, rudy forbid use to bread schnitzel until the orders came in. but then, that is one very big reason that we were at capacity 365 nights a year. among all the other great dishes he had on his menu.

besides these great items that we prepared, every guest also had their choice of all they could eat of his fantastic (fresh) authentic rosti potatoes, buttered carrots, green beans almondine, spinach souffle and braised romaine lettuce (a simply elegant side veg).

we served so much food at this place that i had to peel and HAND cut no less than 50 pounds of carrots a day and snap no less than a bushel of string beans, too. and the day before we would steam, and then peel while hot, 100 pounds of potatoes (the linked image is 50 lbs. only) for rosti, but this is why they came in droves from as far away as nyc.
You will need:
  • a meat mallet or tenderizing mallet as some call it (use the pebbled side and try to swing it level so as not to hit the meat with the edge only!)
  • the meat, as portions as you see fit
  • all purpose flour for dredging
  • eggs, beaten
  • bread crumbs, either traditional (home made or store bought) or the japanese panko crumbs that seem to be all the rage the last few years
  • demi-glace, gravy or brown sauce, what ever you have on hand (you could use a cream or supreme sauce too if that is what you like, but it is in no way traditional)
  • the garnishes shown in the picture below as well as a starch and veg of choice

How you do it:
  1. as always, do the best shopping as you can, and gather everything together.
  2. if you have not had the local butcher/grocer prepare your meat or poultry for you then thinly slice your veal or pork into escalopes. if using chicken breast and they are rather large and thick, filet them in to tow pieces each, the same goes for turkey. i like to use a boneless skinless chicken leg and thigh piece (one of my favorite cuts of poultry). this is not so easy to do and you can easily cut yourself trying. so if you wish to use this cut have buy it already prepared like this. (i happen to think that this is the most flavorful choice of them all if veal is off the menu. chicken prepared this way is actually called bachandle.)
  3. sandwich the thin pieces between sheets of saran, bakers paper or recycled plastic shopping bags (my favorite). 
  4. using a meat tenderizing mallet gently pound the pieces on both sides. if only on one side the pieces will have a tendency to retract back and also cup when they are cooked. if you are using chicken breasts that tend to be thicker at one end, pound that area a bit more. the object is to achieve a nice consistently thin (.05 cm) piece so it will fry quickly and evenly. the meat must be fully cooked when the bread crumbs are or you will not like what you are putting into your mouth, either raw meat, or burnt breading.
  5. once the pieces are all pounded spread them out on so that they are all just touching edges. season with salt and pepper and also a bit of powdered mustard. you could also use a good paprika if you want.
  6. IMPORTANT: prepare everything else that you will need and set aside to keep warm. the starch, the veggies, the sauce and the garnishes. once you start cooking the meat you will have no time for ANYTHING else.
  7. then dredge each piece in the flour. Note: i use a plastic bag for this. it gets the job doe well and doesn't get flour all over the kitchen. eliminates cleaning a bowl and recycles a plastic grocery bag ta-boot.)
  8. next wash the floured pieces in the well beaten eggs. if you use a bowl large enough you can get more than a few pieces into the egg at a time, this allows the flour to absorb the egg quite well and thus make the final step of breading a more complete one.
  9. i then take a large bowl or pan (or another plastic bag) which i have previously filled with the desired style of bread crumbs and put one piece at a time into the crumbs. i then make certain that the crumbs have fully covered the piece of meat, press the crumbs ever so lightly into the egg wash to make certain it has adhered. and then repeat until all the pieces are breaded. you really do not want to do this any more than 5 or 10 minutes before frying. IMPORTANT NOTE: how you perform the breading is a major part of your success with this dish. 100% coverage is mandatory to avoid any of the oil getting under the breading and making the pieces greasy and soggy, YUCK! if you press to hard on the pieces the breading will not be able to puff up and away from the meat creating a casing rather than a coating. which will all effect the texture, the taste and the appearance of the finished dish.
  10. using a heavy bottomed deep pan (not one with a non-stick finish PLEASE), or one of those nifty counter top fryers that are available for home use these days, and the best oil you can buy (typically not olive oil, but you can if you feel you must) is a quick and easy way to prepare this dish. however, the traditional method, and the tastiest method is to use butter ( or butter with a bit of oil added to up the flash point a bit) in a thin bottomed non-stick fry panthis second method requires expertise, a fast hand and if you are making more than 1 or 2 portions, a bit of a hassle. but the taste will be oh so much richer.
  11. bring whatever shortening you are using up to a temperature that when tested with some loose breadcrumbs tells you that you are hot enough to fry, but not so hot as to burn your food.
  12. fry the pieces of meat until they are golden brown, remove them to a wire rack or plate and repeat until all the pieces are done.
  13. next put an amount of the sauce onto the plate, place the prepared meat on top of that, and then add whatever else you will be serving with the dish.
  14. serve and enjoy!
The Usual Afterthoughts and Pointers: in the photos below you will see 2 versions. classic schnitzel ala holstein is garnished with a sunny side up egg and a slice of lemon topped with anchovy and capers. just sublime. the other picture shows a version i made one night because i just happen to love hollandaise sauce and there was some sitting on the counter in front of me and i could not resist.
no need to put sauce on top, this will ruin the crispy effect. if you like a lot of sauce either put it under the meat or in a side dish for dipping. 
rosti potatoes are perfect with this as is spaetzle. mash would be second choice and i would not be adverse to broad egg noodles either.  carrots is the classic side, but any veg will do. in the photo here i have sauteed the spaetzle noodles in butter with shallots, diced carrots, green peas and chopped parsley.

holstein in the traditional style with a side of veggie spaetzle
ratatouille and mash
fried egg and the lemon, anchovy and caper garnish
heavenly!

here it is with a bit of hollandaise and a strip of 'chovey.
we use a lot of lime in thailand as good lemons are not always available.

Monday, July 28, 2008

shopping in a store when the power goes is not my idea of fun ...

i had to go to the grocery store today to stock up a kitchen that had nothing in it, something that can actually be fun, but today ... not!

my market of choice was the one on the 5th floor of the emporium mall, 622 sukhumvit rd. phromphong station on the bts skytrain. it is actually the smaller and older sister to the paragon i wrote about yesterday.


when i arrived the power was out for a few square block radius, seems egat (the electric generating authority of thailand) was having a major problem in the area. i spoke to the staff hanging around and they said it had already been an hour so i figured it would probably be not too long before the power came back on ... not! but not knowing this at the time i trekked up the 5 long flights of escalator
to where the grocery was. one thing about the 5ht floor when this happens, there is so much refrigeration that they dedicate a good percentage of their back-up emergency power to that area, not the concessions - their area :-)

so i started to pick-up all the things that any kitchen would need, and i also got everything i would need for lunch. today's menu was going to be chicken thighs and livers in a mushroom and sherry sauce, mashed potatoes, and the all-time-stand-by-favorite, green peas.

simplicity is elegance!
lmao

so as i was touring around the aisles, and picking out all that i needed from my lists ,i started to get a bit anxious. no power coming back on. not too bad for the actual shopping, but a real bummer when i want to leave and go the 5 flights back down to the street level. normally no big deal, but today i will have more than usual in order to set up this new kitchen and its larder.

i know they have a "luuk-nawng" ลูกน้อง, helper/assistant who can take some of the load, but still, i am not relishing the thought. just as i am about to ask the kid at checkout to assist, the power came back up, a cheer was heard 'round the store, air-con units started to hum and we all thought it was gonna be ok ... not! i figure so many appliances and machines were still set to on that they instantly had a localized brown out in the store. groans and grunts were now emanating from the aisles. 2 more minutes went by, up came the power, and it remained on at least until i was able to get my ass into the elevator and down to the street where i caught a taxi back home.

one funny thing, when we got into the lift there was no light in the cab. as the doors shut all the thai girls that were in there started to get all spooky like they do. so me, being the arse that i am, did what my older brothers used to do to me when they would babysit me as a youngster - i started to make creepy sounds like it was a halloween house of horrors. one girl truly freaked! so i stopped. all the others laughed and gave her a hard time. boy i love it here, so much fun everyday :o)

so i arrive at home, trek up-stairs, settle down to work, and also start the prep for lunch. now i am jumping back-and-forth between the kitchen and my office doing computer work and cooking all at the same time. so please pardon the fact that i did not get a full compliment of pictures, but i do have a few good ones of the stages i was able to snap.

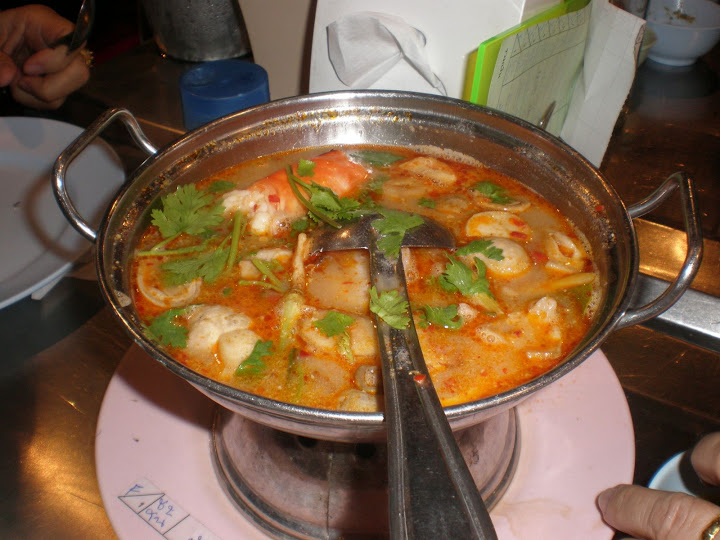
i am cooking for 4 adults, 3 of whom will almost always consume as much food as i will put in front of them, regardless of the portion size. i chopped up 2 medium spanish onions, one bermuda onion (they be in season and i am loving these things everyday), one stalk of a good sized japanese leek (whites with a bit of the green thrown in for good measure), 6 huge cloves of garlic, sliced, some fresh straw mushrooms, "het fang" เห็ดฟาง (if you can not get fresh - never use the canned ones, use button mushrooms instead - canned straw mushrooms are a scam and they suck big time). these are the shrooms that you also see in "thom yum goong", ต้มยำ, spicy and piquant thai shrimp soup and some "het nang lom" เห็ดหนังลม or oyster mushrooms.

i then take the very nice and good sized boneless chicken thighs and cut them in half, season them with some delicatesse paprika, not the shite that most stores have and you sprinkle on deviled eggs thinking you have decorated them, some dried thyme leaf and some fresh ground seasalt and black pepper. i toss the pieces into a recycled plastic grocery bag, add in some all purpose flour, close the bag and do the ol' shake and bake maneuver, remove the pieces from the bag and lay them out on a plate to let the coating set and congeal with the moisture from the chicken.

i am going to garnish this dish with some sauteed chicken livers, so i take those from their bag and put them int a plastic strainer that is more like a basket with large holes. this allows the blood to drain off, the livers to dry ever so slightly, and that way the will sear well when i cook them.

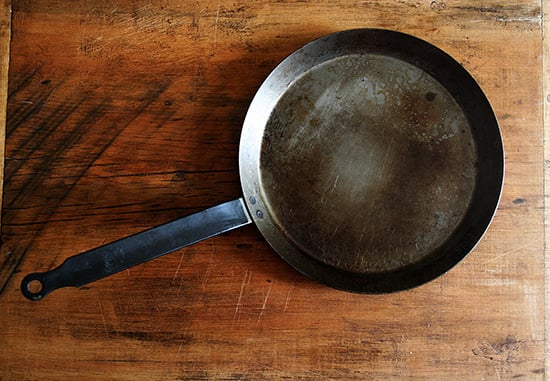
next my good sturdy 12" fry pan, add some good olive oil, bring it up to high temp and add the prepped veggies. as the veggies are sweating, i prepare the quick and easy knorr brand demi-glace mix, a half liter, by putting it directly into the water bottle, replacing the cap, and shaking the living sh*t out of it. when the onions and leek are translucent i pour in about a half cup of majesty thai sherry (i have said this before - do not drink it, only cook with it!), and then add the demi-glace mix (be sure there are no large lumps in it, really feks up the sauce). i let that all come up to temp, throw in some very nice fresh sage leaves i have cut not to small, and a half cup or so of the always-required-chopped-parsley and simmer it all for about 5 minutes. i see it is a bit too thick so i add another cup +/- of water.

notes:
  1. typically paprika in grocery stores is dry, old and not flavorless, but skanky smelling, avoid it at all costs. pay a bit more for good paprika and savor the aroma and taste, and you do not have to use so much. any paprika from hungary is tops!
  2. dry thyme, leaf only, never powder. make sure it is not to old for the same reason you avoid the paprika. when it gets old, it smells like month old laundry.
  3. be aware that any knorr product, or similar, contains salt and food additives so be careful not to over salt your food as you will be adding salt with these mixes. also, if you are to simmer or braise the food in such a product, never add salt until you are done, and always add more water than the directions call for. this way you will not have hard meats from the salt, too much salt taste and not to thick a finished gravy.
  4. i use the sherry to help cut the packaged taste of the sauce mix and to also impart a wine flavor.
  5. fresh herbs can improve, or save almost any dish, or help any pre-packaged convenience additive (like the demi-galce mix) to mellow out. sage is one of my favorites, but do not use too much, or that is all you will taste. it is really good with calves liver and bacon that you de-glaze with balsamic vinegar. (did you know the american indians smoke sage in their "peace" pipes? hmmmmmmm :-p )
i only have a one burner contrivance so i must now put the sauce to the side and sear the chicken pieces. the pot that i have, the only one large enough for the finished batch, is a very basic, very thin, very alu-min-i-um thai pot that's 30 cm in diameter. if you ever leave these things unattended you will regret it. anything (even water) will stick in a minute, burn in to 2. i put about a cup of good olive oil and bring it up to a high temp and then i very careful, with thongs, place - not throw, not drop, not put - but place the pieces into the pot skin side down.

i start the process by placing one of the pieces on the far outer edge and continue around and circle into the center. that way the first pieces will not be burning by the time i get the last ones in, and the temperature will have balanced out nicely across the surface of the pots bottom. i let them sear - untouched, do not poke, do not nudge - until they release themselves from the bottom of the pot.


then i gently grab them with the tongs and turn them, once again placing them carefully so as not to spatter the oil and burn myself. notice that they have contracted and shrunk a bit in sieze and they now fit perfectly across the bottom which allows for every piece to evenly brown and crust up. this will make a very big difference in your final product and the final texture, which we all know affects the final taste.

  • note: when turning with tongs remember these are boneless chicken thighs and if you handle them nonchalantly, they will break up int small pieces. this will not effect the taste, but it sure does effect the final serving and presentation of the dish.


when the chicken is properly seared on both sides i then carefully pour the sauce over the chicken pieces. i do not stir it, poke or shake it, i wait. i have not removed the olive oil or any of the rendered chicken fat either, to do so would be sacrilege and diminish the final taste immensely.

when i see that the sauce has come back up to temp i turn the flame down to a simmer, and after a minute or 2, i then carefully grab both handles of the pot using protection (i love using folded dry washcloths for this) and gently with a swirling motion, move the pot until i see that the chicken is no longer cleaved to the bottom and the sauce is mixing in and under. i place the lid on top and let it ride for about 5 or 10 minutes, no more. i then remove the lid and check the product. all looks good so i put it aside, grab a small saute pan, add some olive oil, and bring it up to temp.


i then carefully add the livers to that pan, let them sit while they sear, and then carefully start to swirl the pan so they will get cooked on all sides. i like my liver medium rare to medium, so this only takes about 4 to 5 minutes. when the livers are done at most, i set the pan to the side and make sure it is canted on an angle. this way any blood will collect to the side. when i see the yare drained i remove them from the pan and set them aside in a dish.


during all of this i have been running back and forth to my office, doing my daily work load, and peeling potatoes and defrosting the peas. i cut the potatoes and boil them in - water with a good amount of the sea salt, drain them when they are done - leaving a few tablespoons of water in the bottom. i have 6 large russets, so i add about 4 tablespoons of unsalted butter and about 2 tablespoons of olive oil margarine, fresh ground black pepper and i begin to mash. when that is complete i taste and correct with a tad more sea salt, and put them aside. i have had the peas steeping in hot water so they do not even need to be put to the fire.

i am now ready to deliver upstairs and plate on site as it were.

i first place the tates on the plate, make a small well for some sauce, arrange the chicken and livers as i like them, and then i carefully ladle sauce onto them. the final step is to add the peas to the plate (they are naked, they need nothing) and i we are ready to eat.


yes? no? maybe?
just like mama never made?